Wednesday, July 23, 2014

COLLABORATIVE WORK WITH JOANNA GRANT


A while back, Joanna Grant of Joanna Banana Design Originals, got the wonderful idea to do something with those half-finished pieces of art hanging around her studio  The idea was to mail her half-finished pieces to her artsy friends (first obtaining their permission) and invite them to finish the pieces and then mail them back to her.  In exchange, she also invited them to mail a half-finished piece of their art for her to finish and mail back.

Doesn't this sound interesting?  Are you excited yet?  I bet that you have some half-finished pieces of art that you wished someone would finish for you too. Think of the surprise and excitement when you open that package and find your original art work completed in a way that you never would have imagined.  This was great fun and I would do it again in a heartbeat and encourage you to contact some of your artsy friends and start swapping art work.

First up:  The beautiful half-finished art work that Joanna sent to me.  


Joanna relayed that she started with a substrate of salvaged matte board and then covered it in recycled wallpaper for the background.  In case you are not familiar with Joanna's work, I would call her the "recycle queen" because she uses a lot of recycled materials and at times she even recycles her own art work.  Next, she added a laser print copy of the vintage girl, added several layers of paint and swirly die cut pieces made from her Silhouette machine….added a few pieces of book text and the leaf.  That's as far as she got before she mailed it to me to finish.

Next up, the finished piece:


I have to admit that putting that first pen stroke to someone else's art work was at first a little intimidating but once I "got on a roll" it quickly went away.

To finish the piece I basically used acrylic paint pens to add dots and circles to lighten or deepen colors.  I eliminated the "Princess Leia" buns with paint and the addition of a flower and butterfly.  Lastly, I added the "dream" sign.  A little color added here and there and drum roll, please….finished!

The half-finished piece that I sent to Joanna.


This is my half-finished piece that I sent to Joanna.  It consists of a gelli print background glued to a matte board substrate.  Various pieces of gelli prints and hand painted papers were added along with the two faces and hand cut from magazines.  Pretty simple, huh?

Now, get ready…this is what she sent back:  


PRETTY AMAZING!  RIGHT?  I am blown away by this piece and keep looking at it, studying to learn how she made it.  I know that Joanna makes a lot of painted embellishments herself and stockpiles them for future projects.  Embellishments like the painted circles and flowers.  (This is something that I think I will implement into my art process.)  You can't see from the picture but she added glittery tape, rhinestones, foil and 3-D flowers.  She even finished the back of the piece which looks like a collage of colored tissue paper and paints?  Joanna's work is always superbly done and finished to perfection so I guess that the finished back shouldn't surprise me.  lol!  UPDATE:  Joanna now has a description of her process on her blog.  Hop on over and take a look!!

Thanks, Joanna for a fun project.  I loooove it!!!!

Interested in seeing more of Joanna's lovely work?
Visit her blog: http://joannabananadesignoriginals.blogspot.com

Until next time!

Hugs,
Ginny

ONE THING LED TO ANOTHER….


Anyone else have problems with the unmounted cling stamps 
falling off the acrylic holder?  Well…I DO!  
Sooooo...I decided to mount them permanently to wood blocks.  
I couldn't find wooden blocks but instead I found "foam counting blocks" in 
the children's section of the Michael's store.  
These were just the right size and worked perfectly.


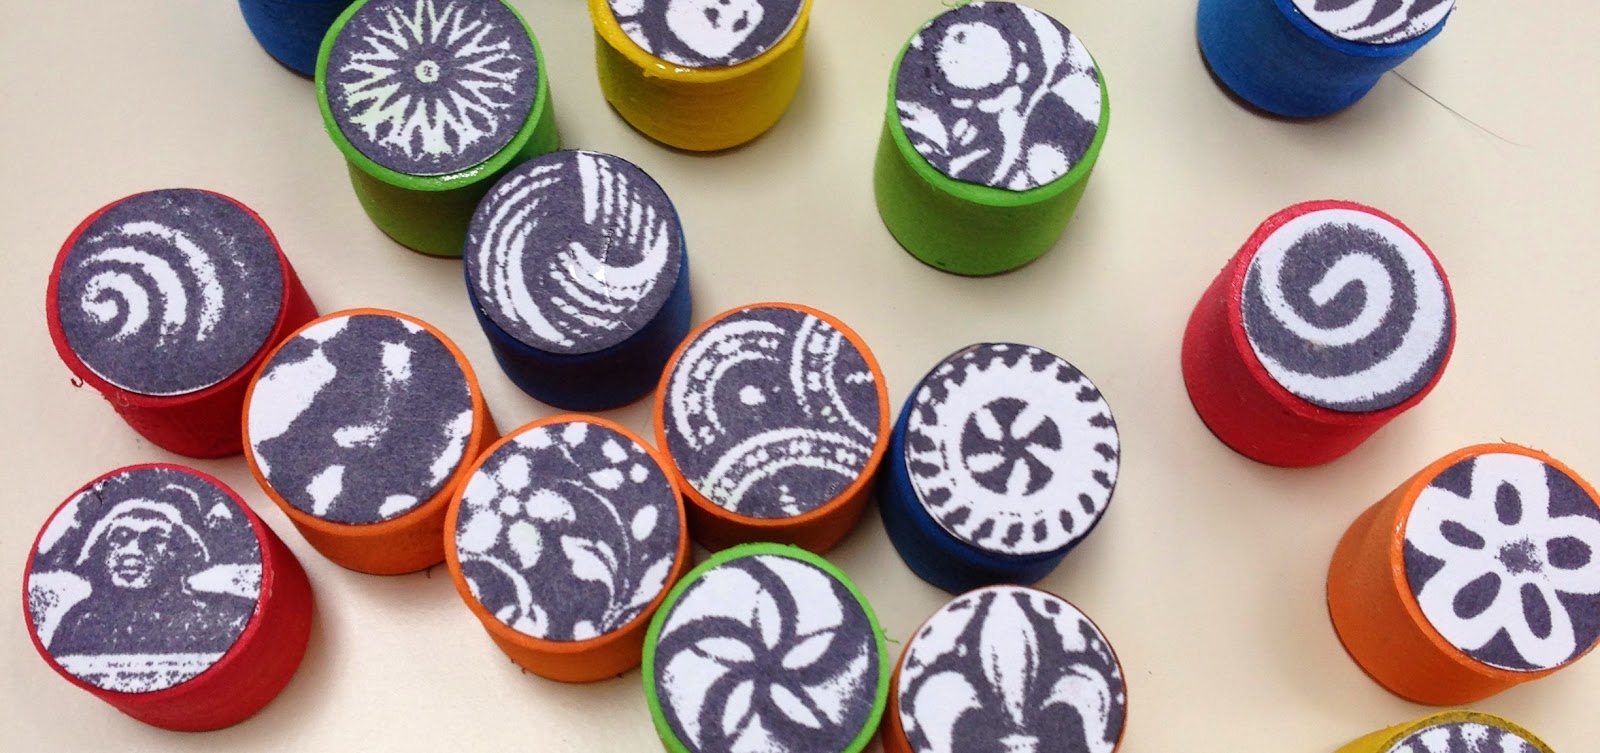
After mounting alphabet stamps to the square foam blocks I was left with many cylinder shape counting blocks that were also included.  Not wanting to waste anything I decided that I would use them to make stamps.  I have done this before by carving or impressing a design in the foam using different tools but I think the foam was more like styrofoam.  This foam resembles the foam that you heat and press objects into….so I thought that I would give it a try and see what happens. With my heat gun in hand and a few fancy buttons and brass stampings, I went to work.

First, let me tell you...these little buggers went flying when I applied the heat gun to them.  Whoof!  Off my desk they flew!  They are so light weigh.  The solution? Wedge them into the inside corner of a jewelry size box with the heat gun aimed toward the corner.

OK, now that we have that over with...here is what you do.  Heat the top side of the foam until it gets shiny and then quickly mash your button or object into the foam and hold for about 30 seconds.  Then stamp your image on a white piece of paper and if you are happy with it...cut or punch it out and glue it to the opposite side of the foam.  Be sure to line up the image with the stamp.  In other words…don't glue the image upside down.  This will be your guide for stamping.

If you are not happy with you image, wash the ink off, let it dry and start over by reheating and making another impression.


I have no idea how I am going to use these little gems but I am sure that I will think of something.  Maybe some patterns?  I see possibilities for the zebra looking pattern.


Until next time….

Hugs,
Ginny

Tuesday, July 22, 2014

USING A CUTTLEBUG MACHINE TO EMBOSS METAL


OK everyone…I need a change and it's time to put my journals down and start making jewelry.  Not that I need more jewelry…I have tons of it that I either made or bought but I looooove making jewelry…in particular the metal forging part.  So here we go!!!!

My inspiration came while at our local Michael's store.  I noticed that Cuttlebug (the paper embossing machine by Provo-craft) now has metal blanks that can be used with the plastic embossing folders.  Sorry...but I wasn't able to determine the type of metal nor the gauge metal.  Anyway, a light bulb went off in my head and I thought that I would give this a try with the metal that I have on hand... plus, I know that I can anneal the metal to make it softer if needed.  Well….I have to tell you…It worked great!  That little Cuttlebug machine is like a mini rolling machine!!!

First, I need to caution you that because the Cuttlebug machine and the embossing folders are not made for this purpose, you need to be careful so as not to exert any more pressure than you would when embossing paper.  In other words...don't force it!

The first metal that I tested was scrap jewelry that already had coloring and patina added.  It looks to be 26 gauge copper (not certain).  I re-cut some of the pieces, reshaped some by twisting and curling and left others as is.

scrap jewelry pieces

I tried the Vintaj metal embossing folders on some by using the "A" and two "B" cutting plates for the first pass and then added a 3ml. piece of mylar for a second pass.  This gave me a pretty decent emboss.  Of course, a lot depends on the gauge metal and how soft it is...so go slowly and like I said…don't force it.

Embossed with a Vintaj metal embossing folder

I also tried a few with a plastic embossing folder.  This required one "A" and two "B" cutting plates for the first pass, adding a 3ml sheet of mylar for a second pass and adding a folded paper napkin for a third pass.

Embossed using an Anna Griffin paper embossing folder. 
Embossed with a Cuttlebug paper embossing folder.

My final experiment was with 26 gauge copper metal (not annealed) and a paper embossing folder. It went through with one"A" and two "B" cutting plates and in two passes.  The emboss is pretty darn good!  Please excuse the tarnish…these will receive a polish and patina later.

26 gauge copper un-annealed
I learned from this experiment that the cutting plates and added shims will vary depending on the gauge metal, type of metal and whether the metal is annealed or not.  Now that I have gotten used to the feel of how the metal rolls through the machine, I am confident that it can be done without damage to the machine.

MAKING DOT PATTERNS:

Another handy tool that I love to use is a spring punch.  It's great to use with a hard rubber pad to put those darling dimpled/dot designs in metal.  Just mark where you wish to place the dots with a sharpie marker, put the metal piece face down on the hard rubber pad, position the end of the punch on the dot and punch down to activate the spring.  Presto!  A beautiful dot pattern is made!

You can find the spring punch and rubber pads at most hardware stores for only a few dollars.

Well, that's all for now so until next time…..

Hugs,
Ginny