Showing posts with label Gelli Printing Plate. Show all posts

Wednesday, July 23, 2014

COLLABORATIVE WORK WITH JOANNA GRANT


A while back, Joanna Grant of Joanna Banana Design Originals, got the wonderful idea to do something with those half-finished pieces of art hanging around her studio  The idea was to mail her half-finished pieces to her artsy friends (first obtaining their permission) and invite them to finish the pieces and then mail them back to her.  In exchange, she also invited them to mail a half-finished piece of their art for her to finish and mail back.

Doesn't this sound interesting?  Are you excited yet?  I bet that you have some half-finished pieces of art that you wished someone would finish for you too. Think of the surprise and excitement when you open that package and find your original art work completed in a way that you never would have imagined.  This was great fun and I would do it again in a heartbeat and encourage you to contact some of your artsy friends and start swapping art work.

First up:  The beautiful half-finished art work that Joanna sent to me.  


Joanna relayed that she started with a substrate of salvaged matte board and then covered it in recycled wallpaper for the background.  In case you are not familiar with Joanna's work, I would call her the "recycle queen" because she uses a lot of recycled materials and at times she even recycles her own art work.  Next, she added a laser print copy of the vintage girl, added several layers of paint and swirly die cut pieces made from her Silhouette machine….added a few pieces of book text and the leaf.  That's as far as she got before she mailed it to me to finish.

Next up, the finished piece:


I have to admit that putting that first pen stroke to someone else's art work was at first a little intimidating but once I "got on a roll" it quickly went away.

To finish the piece I basically used acrylic paint pens to add dots and circles to lighten or deepen colors.  I eliminated the "Princess Leia" buns with paint and the addition of a flower and butterfly.  Lastly, I added the "dream" sign.  A little color added here and there and drum roll, please….finished!

The half-finished piece that I sent to Joanna.


This is my half-finished piece that I sent to Joanna.  It consists of a gelli print background glued to a matte board substrate.  Various pieces of gelli prints and hand painted papers were added along with the two faces and hand cut from magazines.  Pretty simple, huh?

Now, get ready…this is what she sent back:  


PRETTY AMAZING!  RIGHT?  I am blown away by this piece and keep looking at it, studying to learn how she made it.  I know that Joanna makes a lot of painted embellishments herself and stockpiles them for future projects.  Embellishments like the painted circles and flowers.  (This is something that I think I will implement into my art process.)  You can't see from the picture but she added glittery tape, rhinestones, foil and 3-D flowers.  She even finished the back of the piece which looks like a collage of colored tissue paper and paints?  Joanna's work is always superbly done and finished to perfection so I guess that the finished back shouldn't surprise me.  lol!  UPDATE:  Joanna now has a description of her process on her blog.  Hop on over and take a look!!

Thanks, Joanna for a fun project.  I loooove it!!!!

Interested in seeing more of Joanna's lovely work?
Visit her blog: http://joannabananadesignoriginals.blogspot.com

Until next time!

Hugs,
Ginny

Saturday, May 25, 2013

MORE PLAY WITH GELLI PRINTING PLATE

While printing over magazine pages with my Gelli Printing Plate, I discovered that I can print using two colors at the same time, one dark and one light and achieve a layered look in one pull.   This is how I did it.


First, I brayered the dark color on the printing plate...nice and even and not too thick.  Next, I brayered the lightest paint (something with a lot white in it) on top of the dark color but this time, I didn't mix it up too much because I wanted the light color to sit on top of the dark color...not to mix too much with it.


Next, I used stencils to lift some of the lightest color off of the dark color.  I did this by rolling the stencil over the printing plate to make an impression.


Then I positioned the paper on the printing plate and pulled a print.  Drum roll...please!  Ta-Dah!  Two colors in one pull!


Because I printed on a magazine page....look at all the yummy color and texture!


Look what happens if the darker color is a transparent or semi-transparent color.


Is this giving you ideas???

Happy Printing!!!
Hugs!
Ginny

GELLI PRINTING ON MAGAZINE PAGES


I love to make my own printed paper to use in my mixed media art.  It is a way to control the color and pattern to make it uniquely my own.  Also, I feel that the pieces integrate into my art better than the commercially printed papers.  There is nothing wrong with using commercially printed paper and I have occasionally done so but for my art, I prefer the look of the painted papers.

Having said that, I set out to make some painted pages...with my Gelli Printing Plate and magazine pages.  The first thing that I did was to select the magazine pages that I would use for this process.  I selected pages that had interesting colors or patterns.  The subject matter didn't make a difference as it wouldn't be recognized once the paint layers were applied.

For this project, I used magazine pages from Oprah and National Geographic magazines, Liquitex soft bodied acrylic paint, Amsterdam and Master's Choice acrylic paints and various stencils.  I prefer the artists acrylic paints to the craft paints because they stay wet a little longer and some of the artist paints are transparent or semi-transparent giving you additional color and dimension when layering.


The process that I used was to apply one or two colors of acrylic paint, using a brayer, and then making an impression in the paint by rolling and lifting the stencil over the Gelli plate.  I then randomly applied the paint to the magazine page paying particular attention to the parts of the magazine print that I wanted to cover or leave exposed.

Here are just a few of the Gelli prints that I made from magazine pages.


Now, don't you feel like grabbing your Gelli Printing Plate, a few magazine pages, paint, brayer, a collection of stencils......and having some fun????

Until next time!
Hugs!!!
Ginny

Sunday, February 3, 2013

MORE GELLI PRINTING PLATE PRINTS

I had some great play time with the Gelli Printing Plate and my Thursday Art Group.  I am always talking about it and thought that I would demonstrate it's use.  I think that the ladies were impressed...not by my skills but by the versatility of the process....and the gorgeous textures!!!

And....You have to love the unexpected surprises.  It never turns out as planned and I have to say... even the worst prints can be cut up and used in other art pieces.  So far, all of my prints have been used as journal pages.  I just add a little doodling and lettering and called it a day!!!

This is how I made these prints:

I used two colors for this print.  First I brayered yellow paint all over the plate, stamped with bubble wrap, used a texture comb and pulled a print.  Next, I brayered blue paint all over the plate, stamped with a tile stamp, circle stencil and bubble wrap; placed three mermaid masks on the plate and pulled a print. I planned to add a third color but decided that I would lose some of the delicate pattern so I quit while I was ahead!!


These are the tools that I used to make the mermaid print.  Notice that I don't wash my stencils or masks!  (grin)


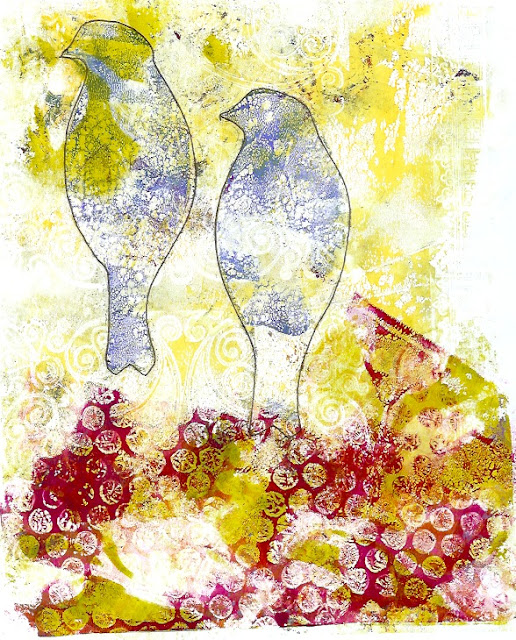
For this next print, I used three colors.  The first color used was yellow and textured with a texture comb.  Next, a magenta color was brayered only in select areas and textured by using a stencil and bubble wrap.  For the last layer, I brayered blue paint all over the plate, textured it with a texture comb and then positioned the bird masks prior to pulling a print.

I love the texture of the birds especially the one on the right and think that I might make prints of birds to cut up and use as tags or ornaments.


This next print is a mess....and unfortunately, I have no idea how it was made.  lol! I started with the yellow background, then added the magenta...didn't like it and kept adding colors and layers.  I finally had to stop before it turned to mud!  This is one print that I will probably cut up and use in my art journal.


This print is a ghost print of the previous print.  A print was taken after I removed the bird masks. (This picked up the blue paint left over from the previous print.) Then I brayered yellow paint all over the plate, textured it with a tile stamp and pulled a print.  Next, I brayered green paint in select areas, used a leaf mask and pulled a print.  Lastly, magenta paint was used in select areas, textured with bubble wrap and pulled a print.  The nice surprise on this print is how the bubble wrap made little round star flowers. That's what I love about the Gelli Printing Plate...you never know what you are going to get!!!


I hope that you enjoyed seeing these prints made from the Gelli Printing Plate and I hope that you are inspired to try some of your own.

If you have a Gelli Printing Plate and would like to share your experiences or tips, I would love to hear from you!

Until next time,
Hugs,
Ginny

Wednesday, October 17, 2012

GELLI PRINT - FLOWERS


This is the first Gelli monoprint that I made.  At first I thought that
I used way too much paint and mark making on it but after I added the
lettering, I really like it! 

The lettering was really a bear to add as none of my pens worked 
over the acrylic paint.  Even my white paint pen didn't want to work so I
ended up using a fine paint brush and Speedball Acrylic Ink.  Ughhhh!
There has got to be a better way.  I heard that the Posca pens work really
well.  I will have to look into that!

The flower mask is a Sizzix die.


I really have one of these bushes in a pot in my yard and everyone who sees
 it when it is in bloom can't believe that it is one plant.  It will have all
three color flowers on it at the SAME TIME!  It really is beautiful!

Can you see the resemblance between my Gelli print and the real plant?
Uncanny isn't it!  lol!

MAKING A MASK

What is a mask pray tell?
Well....a mask is a cover that is usually made of paper or plastic 
which is used to protect the surface beneath it from ink or paint that is
 either sprayed or brushed over the mask.  When the mask is removed it 
reveals an area untouched by the medium....creating 
an image in the negative space.

Before I started playing with the Gelli Printing plate, I knew 
that I was going to use...excuse me.....NEEDED many masks 
for the process.  I invisioned flowers, donuts, hearts, stars, birds, 
people, mermaids...the list goes on.  To do this I first turned to all the 
dies that I have for my Cuttlebug machine.  I cut flowers, swirls, scrolls, 
butterflies, leaves and trees from mylar.  I made many cuts from each
 die and saved both the positive and negative image because.....
YOU NEVER KNOW WHAT YOU WILL NEED.  
Each die cut was then placed into an envelope that was 
labeled with it's name and a traced image.


I drew other shapes such as hearts, stars, donuts, letters, and numbers 
by hand.  For the birds, people, and mermaids, I placed the mylar 
over magazine images and traced them using a sharpie pen.  I cut them 
out and also placed them into an envelope with their image.


I used mylar instead of paper to make the masks because the mylar is 
transparent, making it easy to see when tracing objects, and it doesn't 
warp or tear.  I never wash them, although, I could if I wanted to but it is 
not necessary.  Just don't do what I did and peel the mask off the paint and 
place it paint side down on a paper covered desk. 
 Then I had to peel the paper off the mask!!  
Not an easy task!!

It's a lot of fun making masks and using them with the Gelli Printing Plate.  
Try it!!  You're gonna love it!


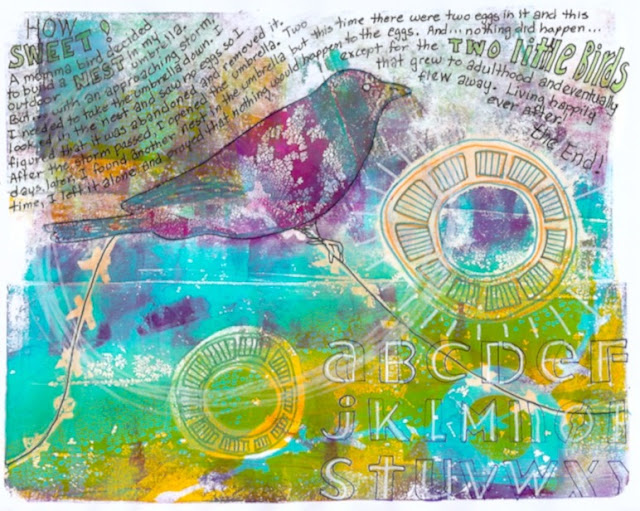
Gelli monoprint using three bird masks.

Till next time!  Hugs!
Ginny 

Monday, October 15, 2012

GELLI MONOPRINT

This is another Gelli ghost print enhanced with a letter stencil,
 doodling around the donut image and journaling.  
I'll show you the before and after image so you can get an idea of 
how much...or I should say how little it is altered.

After

before

I really love the ghost prints because of all the texture 
and the way the white paper peeks through....  
but I haven't tried to alter the parent prints yet and who knows.
I may like them better after they're completed. 

That will be next!

Till next time!  Hugs!
Ginny

Saturday, October 13, 2012

THREE BIRDS GELLI MONOPRINT


OK, so here is the finished Gelli monoprint enhanced with lettering 
and Ranger Distress Ink applied with a brush.  
You can see that I am a person of few words and like to repeat words 
for decorative purposes.  
This is a technique I use a lot because......
I NEVER KNOW WHAT TO SAY!!!  

Seriously!!
I envy people who can spill their thoughts onto paper...I'm just not like that.  
I am somewhat of a private person and don't like to spill my personal life
 on my journal pages for everyone to see.  
What am I doing blogging you ask?  I hope to change!  
In the mean time, I will depend on the words of others and use quotes 
that have meaning to me.....or repeat words for decorative purposes.  

Till next time,
Ginny xoxo

Thursday, October 11, 2012

GELLI PLATE MONOPRINTING

Shriek!!!
My Gelli Plate has arrived!!
If you haven't heard about the new art product in town...
the Gelli Printing Plate used for monoprinting...
you have not been blog hopping.  Everyone is giving it
rave reviews and creating some pretty awesome art prints.  I can't wait to
get started but first let me explain that you don't have to use the
Gelli Printing Plate which is a hefty $29.00 plus shipping for the
larger 8"x10" plate.  You could make your
own by using Knox unflavored gelatin and water.
There are plenty of recipes and You-Tube videos on the
internet so I won't go over them here but I will say that
you do have that option.


I chose not to go the gelatin route because it would take a little
forethought to make the plate beforehand and I know that I probably
wouldn't do it.  Also, the gelatin only lasts for up to two weeks and
would take space the refrigerator.  Which I don't have!
So, I opted to buy the Gelli Printing Plate which will be ready and
available whenever I have the urge to play!

The BEST tutorial for using the Gelli Printing Plate is the
Gelli web site:  http://gelliarts.blogspot.com.
Joan Bess who hosts the site is simply amaaaaazing!!  She pretty much
covers it all...she uses stencils and masks,  purchased rubber stamps
and homemade moldable rubber stamps, and found objects.
 She shows how to enhance the print afterward by using dyes, inks, acrylic
glazes and watercolor as a tint.  This lady has loads of ideas and creates the
most unbelievably gorgeous prints using techniques you
would never have dreamed of!  Also, did you know that you can use
the Gelli Printing Plate to print fabric too?
Shriek!!!
Yes, you can even print FABRIC!
Think of the possibilities!!!!

OK, let me show you some of my first attempts using a Gelli plate and what I have learned thus far.  For this first print I used three colors of soft bodied Liquitex acrylic paints and printed them in this order: Light Blue Violet, Indian Yellow and Deep Magenta.  (Any soft bodied acrylic paint or craft paint will do.)  I fully covered the plate with paint for each printing and used stamps, stencils and flower masks for each.  Also, I fully cleaned the plate with water and a baby wipe between printings but I didn't always clean the roller, stencils or masks.  Most of the time the paint was dry and wouldn't transfer to the plate anyway. 
This first print taught me that too much of a good thing can muddy the pot!  I did too much mark making and stenciling with each layer and lost much of the detail. You can't even see the letter stencil through all the layers! And....I had such high hopes!  Oh well.....this will make a nice journal page once I start adding to it.  


I have to say.....it takes a little forethought to decide in which order to layer the colors and when to apply the masks.  For example; If you use a light color for the first printing and then use a darker color and mask for the second printing, the area masked will be the lightest color.  If you did the reverse and used the darkest color for the first printing and applied a lighter color and mask for the second printing, the masked area would be the darker color.  So think about how the different colors and layers are going to work together and when to apply a mask if you are using one.  The process does have its surprises but you can manipulate the effect with some planning.

For my next attempts, I eased up a little on the mark making and stencils and even tried strategically applying the paint to specific areas and not the whole plate.

This next print was made by loading up the entire plate with color for the first two printings using India Yellow and then Bright Aqua Green.  I went a little easy on the stencils and mark making this time.  For the third printing I rolled the deep Magenta color only in the area of the birds, applied the bird masks, a funky ribbon and made a print.   There was paint left on the plate so I removed the bird masks and made a ghost print by using a clean sheet of paper and rubbing it over the plate.  I put this aside for use later.  I decided the print wasn't finished so I rolled the Light Blue Violet paint in select areas, used a circle stencil to remove some paint and printed for a fourth time.  Do you see what I mean about manipulating the print with some planning?


This is the ghost print made from the previous print.  After the birds, I printed the blue areas using stencils and masks and then printed the yellow area just using masks.  I started to embellish this by adding Ranger Distress ink (you could use pan pastels) to the background to soften some of the white areas and then added the inked outline of a "B" stencil.  See how different the ghost print is from the original?  It's all in the order of how the paint and masks are applied.  Two completely different looks!


Here are a few more mono prints using the same colors but in a different order. The first one is the original and the one that follows is the ghost print.  I think that I like the ghost prints better.  What do you think?


Look at all the delicious texture that is created by the Gelli Printing Plate.

Don't you just love it?

Till next time......
Ginny