Sunday, March 17, 2013

PAINTED VILLAGE


Sometimes I like to work small!  In this case a  6" x 6" gallery canvas.  Something that I can complete in a day or two and and then sit back and admire as it hangs on the wall of my studio.  You see, my studio except for all the art supplies neatly arranged on my drawing table or on shelves, doesn't really look like an art studio at all.  There are no drawings or paintings created by yours truly to identify the artist who lives here.  Well....I decided that had to quickly change and I started painting canvases instead of painting in my journals.  Now, at last, it is beginning to reflect me...the artist...and who I am!

With that said, I purchased a package of four small canvases, thinking that they would look great lined up in a row above the closet doors.  I have always wanted to paint a collage of a village and do it in the four seasons.....trumpet fanfare...an idea was born.

This is a summary of how I painted a village in the four seasons:

Materials used:

6"x6" gallery canvas
gesso
acrylic paint (Two colors for the ground and sky, two different colors to accent and distress the buildings and white paint for the snow, clouds and fence.  In addition, each painting except for Winter had painted flowers and tree leaves.)
Bubble wrap
Ephemera: book pages, scrapbook paper, envelope liners, used postage stamps, etc.
Paper dinner napkins for the sunflower sun.
Archival ink or StazOn ink. I used black or brown for the tree.  Black for the fence.
Stamps:  I used a stamp for the tree and fence.
Deli paper
Black Pitt pen, medium.
White paint pen, fine
Mod Podge or Mat Medium for gluing.


First, paint the canvas with a coat of gesso.  This will prime the canvas and help to shrink the canvas if it has any slack to it.  After the gesso is thoroughly dry, paint the bottom 1/4 of the canvas with the the ground color and the remainder of the canvas with a sky color.  Except for the Winter canvas, I chose not to be traditional with the colors but at the same time I chose colors that would evolk the feeling of the season.

Next, I painted the clouds and snow (Winter) with white acrylic paint and bubble wrap.  Then I started gluing the paper napkin sunflowers for the sun (Fall and Summer) and cutting and gluing rectangles from ephemera and scrapbook paper for the buildings.  Note: Paper napkins are usually three layers and must be separated before gluing.  Using only the top layer gives a transparent quality.  The roofs were cut from envelope liners or scrapbook paper and the gingerbread looking roof was made by using a Martha Stewart decorative punch.  I pretty much used what I had in my scrap box.


Now the real fun begins...this is where you start to embellish and add personality to the buildings.  Not that it doesn't start to have personality by the choice of paper and patterns but this is where you decide if the building is going to be single or two story, the location and style of doors and windows...if it is going to have a porch, steps, be whimsical or realistic.  This is where the village starts to come to life!

Don't forget to wrap the village scene around the sides of the canvas.


Before the windows and doors are drawn, distress the buildings and ground by smearing with your finger a contrasting paint color.  Not too much but just a little accent to give the buildings depth.  Now it is time to outline the buildings with a black Pitt pen or fine paint pen and draw the doors, windows, porch, etc.  Next, use a white paint pen to paint the window molding, highlight the roof scallops, tree leaves, etc.
SUMMER

SPRING

FALL

WINTER
To add the tree and fence, I first stamped directly onto the canvas but that was like stamping on a trampoline so I decided to first stamp on deli paper and then cut, glue and paint the leaves, flowers,  grass, etc.  This worked perfectly and in some instances, the background color showed through well enough that it didn't need to be touched up with paint.

The last step is to paint the leaves, flowers, or snow on the tree and fence and sign your work!

There you have it...the four season village scenes.  Hope that you enjoyed this tutorial!


Until next time!
Hugs!
Ginny

LIEBSTER BLOG AWARD


Valerie Sjodin from http://visualblessings.blogspot.com kindly gave me a blog award that's about discovering new blogs.

Thank you so much Valerie for thinking of me.  You have touched my heart greatly by including me in your five choices and it is an honor that I hope to pass on to five other very deserving artists.


ABOUT THE AWARD 

This award was designed to be a blog award in the pay it forward fashion. Once you've been nominated, you award it to five blogs that you like that have fewer than 200 followers, to encourage new visitors to visit these blogs. 

RULES FOR ACCEPTANCE 

Thank the person who gave you the award and link back to their blog. Post the award onto your blog. Give the award to five bloggers who you appreciate that have fewer than 200 followers. Leave a comment on their blog letting them know that you have given them this awesome award! 

PAY IT FORWARD

There are so many bloggers who have inspired and helped me to date and to limit my choices to just five was a very hard task...anyway, here are my choices of art blogs that have less than 200 followers and that I know you will enjoy:  

Johanna Banana Design Original's - http://joannabananadesignoriginals.blogspot.com
Lori Bradford's Art - http://loribradfordsart.blogspot.com
Kim's Kreative Corner - http://kimmerbe.wordpress.com
Zoe Ford - http://www.topfloortreasures.com
Lula Pomme - http://lulapomme.blogspot.com

(I may have included a blog with over 200 followers as the number of followers was not always listed but I still felt that these individuals were very deserving.)

Recipients, you may copy and paste to your blog and change the introduction and the list of blog awards.  I hope that you decide to participate and award some other very deserving artists.  Make their day!!!

Hugs,
Ginny

Saturday, February 23, 2013

TAGS, TAGS, TAGS


What started out as a simple Birthday card to place with a very 
small gift turned into a tag obsession.  
I got the idea to use a folded 3"x 6" tag as a Birthday card 
but when I was done, I wasn't happy with it... so I kept painting 
and doodling and ended up making a really cute tag, which 
led to another painted tag and then another....


These were really fun to make and are something that I 
can whip together in 30 minutes or less...they are great for  
testing a new technique or medium.  
I don't have any plans for how I am going to use them 
but I suspect that they will end up in one of my journals.

Until next time....
Hugs
Ginny

Saturday, February 16, 2013

PAINTED EGGS


Well, I put my nail bed to good use this week painting egg owls to give as Valentine presents.  Not egg-exactly the Valentine present that you would expect but the recipients were thrilled none the less... and with Easter around the corner, I bet they put them to good use.

For the past two weeks my art friends and I have been painting and decoupaging eggs.  I wish that I thought to take pictures of the other members eggs because they are just stunning!!!  (Maybe a future post.)  Anyway, I thought that I would show you the eggs that I painted.

My inspiration for the eggs came from rocks painted by Olga Sugden, Goldeneggstudio.  Olga is an unbelievably talented artist whose work I first noticed on greeting cards and have since discovered her beautifully painted rocks. My love for owls and whimsical faces made these a natural choice to paint and hang on my wire tree (and to give as presents).


Wednesday, February 6, 2013

A BED OF NAILS

This is just too good not to share.  A friend of mine gave me a box of supplies to make Pysanky eggs.  You know, the Ukrainian eggs with intricate designs that are applied with melted wax and dyes.   I don't plan to make the dyed eggs but being a mixed media artist and one who loves to repurpose, I couldn't turn down this treasure.  I still don't know how I am going to use the dyes (I need to research this because the dyes are labeled toxic) but I'll soon figure it out.

Anyway to the point!  In the box was a gadget made from a cardboard box lid with nails sticking up from it which I gathered was made to sit the egg on to dry. What a wonderful idea!!!!  And....since I am currently in the process of painting paper mache eggs for my Easter Egg Tree, this couldn't have come at a better time. Quite honestly, I couldn't figure out to paint the entire egg in one sitting and I dreaded painting half the egg and waiting for it to dry in order to paint the other half.  I am a very impatient person about some things.

The gadget that I found in the box would only hold one egg so I decided that I would make one that could hold several eggs at one time.

This is how I made the egg holder:

I used a small 4" X 4" jewelry box and flat head nails.  I think roofing nails or upholstery tacks would be perfect but I couldn't locate either in my stash.  (Being the impatient person that I am, I couldn't wait until I made a trip to the hardware store.)

I used a pencil to make a grid to locate where I was going to position the nails. Then from the top of the lid, with the lid still on the box, I pushed the nails through to the inside of the box.  And there you have it...you are done.  It's as simple as that!  Easy Peasy!!!


I know that I will use this box for drying items besides eggs and the nice thing about it is when not in use, the pointed side of the nails are inside the box where nobody can get hurt!!!


Until next time......
Hugs!
Ginny

Sunday, February 3, 2013

MORE GELLI PRINTING PLATE PRINTS

I had some great play time with the Gelli Printing Plate and my Thursday Art Group.  I am always talking about it and thought that I would demonstrate it's use.  I think that the ladies were impressed...not by my skills but by the versatility of the process....and the gorgeous textures!!!

And....You have to love the unexpected surprises.  It never turns out as planned and I have to say... even the worst prints can be cut up and used in other art pieces.  So far, all of my prints have been used as journal pages.  I just add a little doodling and lettering and called it a day!!!

This is how I made these prints:

I used two colors for this print.  First I brayered yellow paint all over the plate, stamped with bubble wrap, used a texture comb and pulled a print.  Next, I brayered blue paint all over the plate, stamped with a tile stamp, circle stencil and bubble wrap; placed three mermaid masks on the plate and pulled a print. I planned to add a third color but decided that I would lose some of the delicate pattern so I quit while I was ahead!!


These are the tools that I used to make the mermaid print.  Notice that I don't wash my stencils or masks!  (grin)


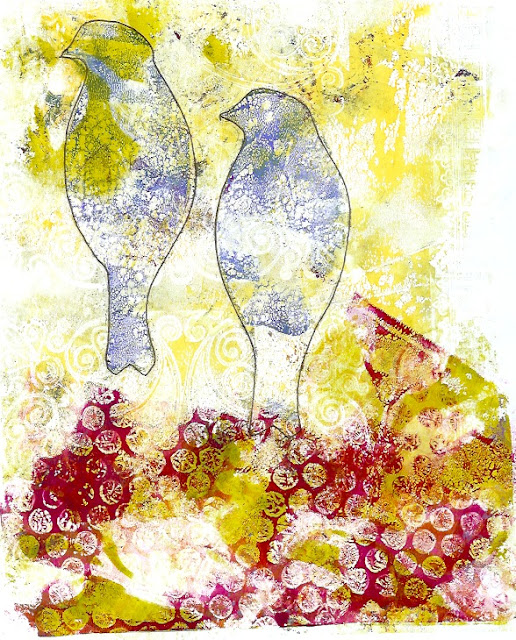
For this next print, I used three colors.  The first color used was yellow and textured with a texture comb.  Next, a magenta color was brayered only in select areas and textured by using a stencil and bubble wrap.  For the last layer, I brayered blue paint all over the plate, textured it with a texture comb and then positioned the bird masks prior to pulling a print.

I love the texture of the birds especially the one on the right and think that I might make prints of birds to cut up and use as tags or ornaments.


This next print is a mess....and unfortunately, I have no idea how it was made.  lol! I started with the yellow background, then added the magenta...didn't like it and kept adding colors and layers.  I finally had to stop before it turned to mud!  This is one print that I will probably cut up and use in my art journal.


This print is a ghost print of the previous print.  A print was taken after I removed the bird masks. (This picked up the blue paint left over from the previous print.) Then I brayered yellow paint all over the plate, textured it with a tile stamp and pulled a print.  Next, I brayered green paint in select areas, used a leaf mask and pulled a print.  Lastly, magenta paint was used in select areas, textured with bubble wrap and pulled a print.  The nice surprise on this print is how the bubble wrap made little round star flowers. That's what I love about the Gelli Printing Plate...you never know what you are going to get!!!


I hope that you enjoyed seeing these prints made from the Gelli Printing Plate and I hope that you are inspired to try some of your own.

If you have a Gelli Printing Plate and would like to share your experiences or tips, I would love to hear from you!

Until next time,
Hugs,
Ginny

FEBRUARY CALENDAR PAGE

Running a little behind...I have so much to do and keep adding more to my plate. My goal for today is to catch up with my calendar journal by finishing the January journal entries so that I can move on to February.  I'm almost there!!!  At least I have the February page completed and ready for the journaling to be added.


This is how I made the February page:

I used Dylusions sprays for the background and date squares and Tombow markers for the basket of hearts and the background behind the heart basket.  I was pleasantly surprised how the yellow Tombow marker matched the yellow color of the Dylusions and how well they blended together.


The basket of flowers is a on a fold-out page.  When closed, you can see the quote that was part of the January page.  I planned the February page first so that the shape or cut-out would follow the shape of the hearts....then I made the quote page fit the shape.


The basket is made by using a Zentangle pattern.  It looks hard but is easy peasy. A little time consuming but easy just the same!  Here is how you do it:


Next up...MARCH!  Hmmmm....I'm thinking March flowers!  March is the month to plant flowers and vegetables in Florida.  Maybe I will fill the page with lots of flower doodles.

Until next time!
Hugs!!!!
Ginny