Tuesday, June 18, 2013

PAPER LUNCH BAG JOURNAL


I thought that I would share how to make lunch bag journals.  
They are so simple to make!!!  
They make wonderful gifts and use materials that you probably 
already have around your house...that is 
if you pack lunches using paper lunch bags.

Materials used:
1 paper lunch bag.   5 1/8" X 10 5/8"
Art work 4 1/4" X 4 1/4"
Piece of fabric 5 1/4" X 5 1/4"
Washi tape, duct tape or any other decorative tape 11"
1 piece cardstock to insert in bag 5" X 10"
Cardstock, bristol, watercolor paper or graph paper (for pages) 5" X 10"
Waxed thread or dental floss (unflavored)  2 ft.
beads and buttons (2) for decoration

Tools used:
Awl or strong needle for punching holes
Heavy duty needle for stitching pages to cover
Sewing machine
paper cutter
Bone folder
Scissors
metal straight edge
x-acto knife


To stiffen the bag (mine was thin) cut a piece of card stock 5 " X 10" and insert it into the bag.  Next, fold over the open end of the bag toward the side with the bag bottom and tape closed.  For decoration, I also added a piece of tape to the bag bottom.

Inside cover


Leave the right edge of the bag bottom open as it later forms a pocket for inserting things like your business card, bookmark, etc.


pocket on iside cover

Making the journal cover:  Fold the bag in half with the tape to the inside.  On the cover (back side of the bag bottom), place a piece of fabric, center the art work on the fabric and stitch by machine.  If you don't have a sewing machine, you could use glue or hand stitch.  Also stitch around the edge of the back cover.

Making the inside pages:  Cut the inside pages to size, 5" X 10", fold in half, burnish the fold with a bone folder and stack....one inside the other.  Once the pages are stacked, trim the right side of the stacked pages using a ruler and x-acto knife so that  they will be neat and even and not stick out from the cover.  The more pages that you have, the more necessary it is to trim the edge.  Depending on the weight of the paper you are using and the number of pages, it may not be necessary to trim.  You be the judge!

Stitching the journal pages to the cover:  Now you are ready to stitch the pages to the cover and add the beads and button to the thread tail.  I used a bookbinder awl to punch three holes through all the pages and cover at the spine (Fold).  I made one hole in the middle and a hole about 1/2" from each end.

Thread a large heavy duty needle with the waxed thread and starting at the outside top hole of the cover push the threaded needle to the inside and through all the pages.  Make sure that you leave a 4" min. tail of thread on the outside of the cover.  Next, go from the middle inside hole to the outside. Then to the outside bottom hole to the inside and then back to the inside middle hole to the outside. You should now have two threads on the outside of the journal cover.  Bring the thread at the middle hole to the top of the journal and tie it off with the thread from the first hole.  Add beads and button to the tail, knot off and whal--la!!!  You are finished!!


Do you like the little party dresses?  I learned how to make them in Joanne Sharpe's class "Doodle Art and Letters."  I think that this class is going to be one of my most favorite Joanne Sharpe classes.  I love to doodle but I never considered myself very good at it.  My doodling used to consist of drawing spirals and circles....over and over again!!!  Boring!!!

Anyway, if you are like me and want to expand you doodling horizons...you should consider this class.  Joanne has a way of teaching doodling that makes it where anyone can do it....and believe me, I struggled with doodling for a long time.  I struggled with being loose!!!  In this class, Joanne teaches you to make reference cards with doodles such as hearts, stars, lines, flowers, etc. and then shows you how to combine them to make these wonderful whimsical drawings.  Just like the little dresses!!!!

Come join the fun!!!

Until next time!
Hugs!
Ginny

Saturday, June 8, 2013

THINGS ARE NOT ALWAYS AS THEY SEEM

It rained all day today so I spent most of the WHOLE day working in one of my journals.  I should be working instead on the lessons for the on-line classes that I am taking: 21 Secrets, Mermaid Circus and Letter Love 201.  If I don't, they will expire (except for Letter Love which is open forever) before I get to complete them but you know how it is when you have an idea for a journal page in your head and you just have to get it down on paper....well here is the result of my play day!

A collage embellished using acrylic paints and paint pens.
Thanks for stopping by!
Hugs!
Ginny


Friday, June 7, 2013

WHAT LURKS BENEATH THE BIG BLUE SEA?

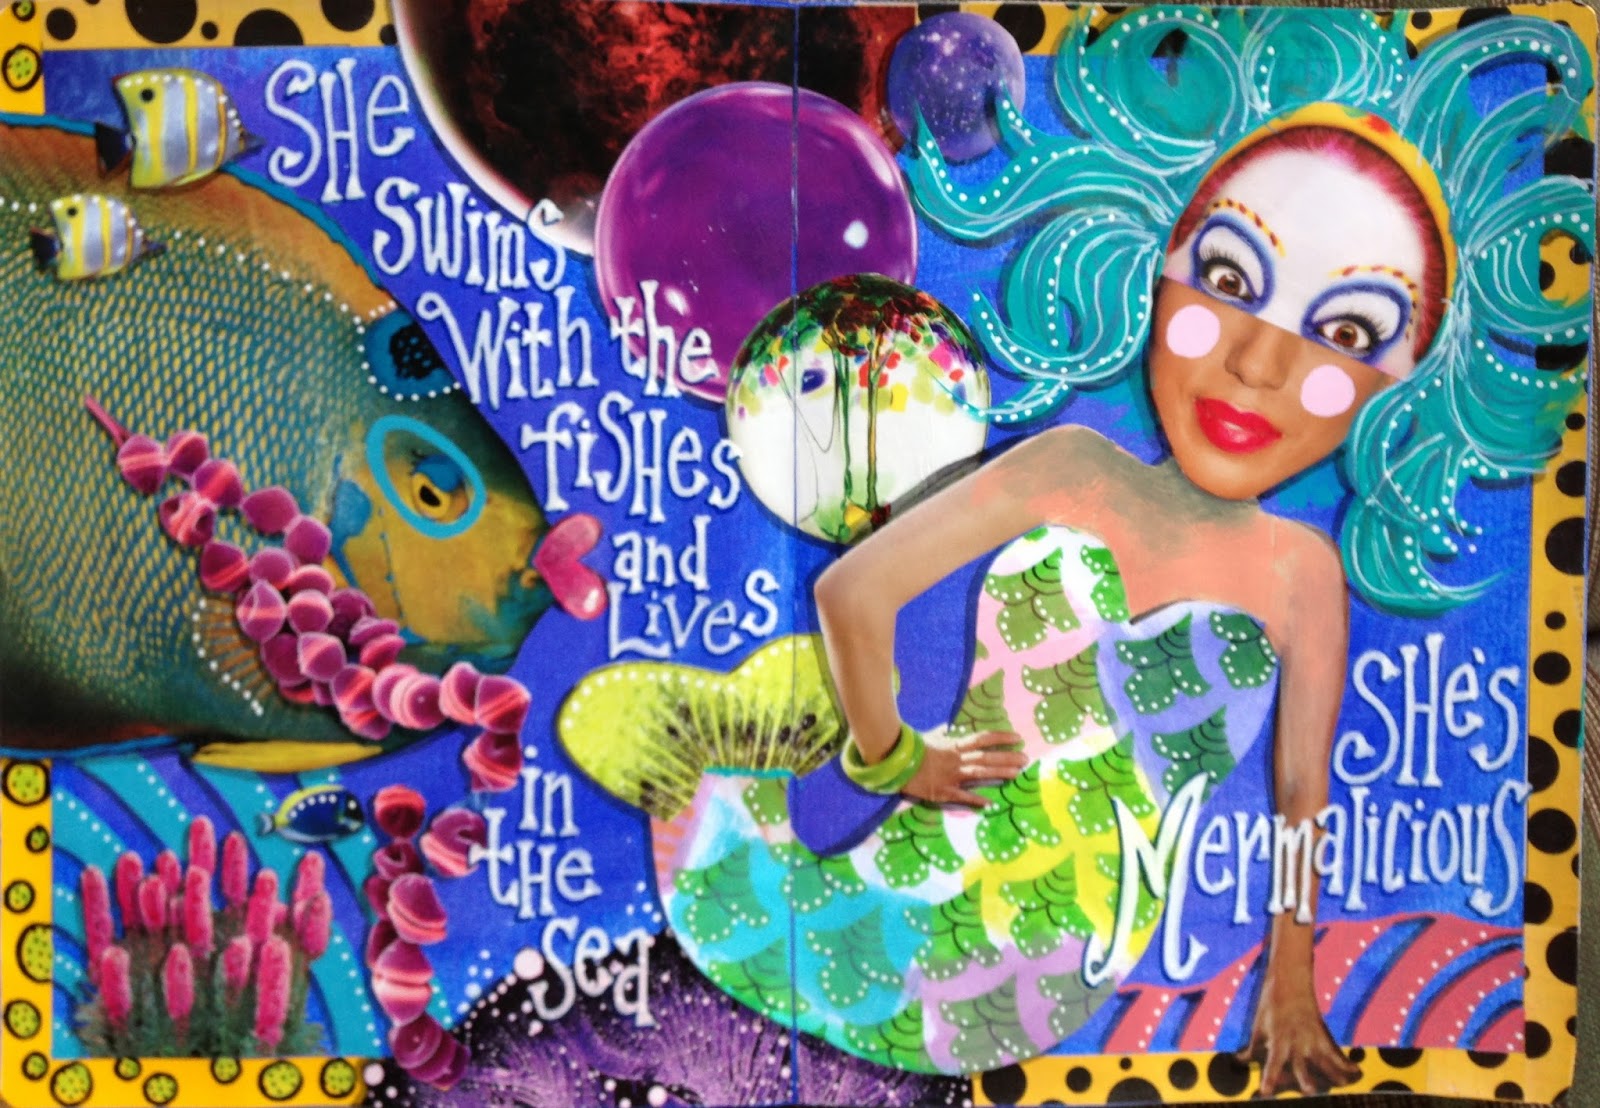
Why do I always forget to take pictures of the process?  Anyway, here are several collages that I made using techniques that I learned from Teesha Moore in the on-line class, Mermaid Circus.


Until next time,
Hugs,
Ginny

Thursday, June 6, 2013

21 SECRETS CLASS WITH ROBEN-MARIE SMITH

I just completed Roben-Marie Smith's "Baby Got Back To Back" class which is part of the on-line class 21 Secrets.  In the class Roben-Marie taught us how to make this darling double-sided journal from a gift bag with a raffia handle.  My journal was made from a recycled Starbuck's gift bag but you could use any gift bag really as the bag is completely covered with torn paper or ephemera.

This project is aptly named "Baby Got Back To Back" because the journal actually has pages on one side and then flips open to the other side where there is a second journal.

You can see from the pictures that I stitched elastic to the front inside cover to hold a pen, pencil and water brush and I stitched a lace pocket to the inside back cover to hold erasers. paper stumps. etc.  Perfect for a friend who loves to draw Zentangles on the go.  It has everything that she needs to take her journaling with her including a handle for carrying....or to hang on a doorknob at home where it awaits the next excursion.

Closed Journal

Inside front cover

inside back cover


Thanks for  visiting and until next time!

Hugs!!!
Ginny

Saturday, May 25, 2013

MORE PLAY WITH GELLI PRINTING PLATE

While printing over magazine pages with my Gelli Printing Plate, I discovered that I can print using two colors at the same time, one dark and one light and achieve a layered look in one pull.   This is how I did it.


First, I brayered the dark color on the printing plate...nice and even and not too thick.  Next, I brayered the lightest paint (something with a lot white in it) on top of the dark color but this time, I didn't mix it up too much because I wanted the light color to sit on top of the dark color...not to mix too much with it.


Next, I used stencils to lift some of the lightest color off of the dark color.  I did this by rolling the stencil over the printing plate to make an impression.


Then I positioned the paper on the printing plate and pulled a print.  Drum roll...please!  Ta-Dah!  Two colors in one pull!


Because I printed on a magazine page....look at all the yummy color and texture!


Look what happens if the darker color is a transparent or semi-transparent color.


Is this giving you ideas???

Happy Printing!!!
Hugs!
Ginny

GELLI PRINTING ON MAGAZINE PAGES


I love to make my own printed paper to use in my mixed media art.  It is a way to control the color and pattern to make it uniquely my own.  Also, I feel that the pieces integrate into my art better than the commercially printed papers.  There is nothing wrong with using commercially printed paper and I have occasionally done so but for my art, I prefer the look of the painted papers.

Having said that, I set out to make some painted pages...with my Gelli Printing Plate and magazine pages.  The first thing that I did was to select the magazine pages that I would use for this process.  I selected pages that had interesting colors or patterns.  The subject matter didn't make a difference as it wouldn't be recognized once the paint layers were applied.

For this project, I used magazine pages from Oprah and National Geographic magazines, Liquitex soft bodied acrylic paint, Amsterdam and Master's Choice acrylic paints and various stencils.  I prefer the artists acrylic paints to the craft paints because they stay wet a little longer and some of the artist paints are transparent or semi-transparent giving you additional color and dimension when layering.


The process that I used was to apply one or two colors of acrylic paint, using a brayer, and then making an impression in the paint by rolling and lifting the stencil over the Gelli plate.  I then randomly applied the paint to the magazine page paying particular attention to the parts of the magazine print that I wanted to cover or leave exposed.

Here are just a few of the Gelli prints that I made from magazine pages.


Now, don't you feel like grabbing your Gelli Printing Plate, a few magazine pages, paint, brayer, a collection of stencils......and having some fun????

Until next time!
Hugs!!!
Ginny

Saturday, May 11, 2013

FISH, MERMAIDS, OH MY!!!

This page is a page from my altered "Potpourri" journal.  For some reason it just looked like a fish to me so it naturally became an underwater scene to include mermaids.


First, I have to say that I am not usually drawn to mermaids, faeries or the fantasy world but lately...they have been included in my life...a LOT!  If you believe that all things happen for a reason, that your universe is planned and that there are signs all around you that hint at what is yet to come...then I suppose it was only natural that while standing in the check out line at a HomeGoods Store that I spied paper napkins with mermaids printed on them.  I immediately purchased them... planning to use them on the Random Acts of kindness cards but as you can see...they made their way into my altered book journal.

I make the statement that mermaids and the fantasy world have been included in my life a lot because I recently signed up for the on-line class, Mermaid Circus, given by Jane Davenport and Teesha Moore.  It is all about mermaids, the circus and fantasy!!!  Were the paper napkins a premonition of things yet to come? Do..do...do..do!!! (MY Rod Sterling imitation.)  Anyway, I will post more about my class and mermaids later.


Until the next time,
Hugs,
Ginny